Experiencing water leaks and reduced cooling efficiency in your refrigerator can be both frustrating and concerning. These issues not only jeopardize the freshness of your food but can also lead to increased energy bills and potential water damage. Understanding the common causes behind these problems and knowing how to address them can save you time and money.
Common Causes of Refrigerator Leaks and Cooling Issues
- Clogged Defrost DrainA blocked defrost drain can cause water to overflow and leak inside the refrigerator. This blockage often results from food particles or ice obstructing the drain hose.Solution:
- Unplug the refrigerator.
- Locate the defrost drain, typically found at the back of the freezer compartment.
- Use warm water to flush the drain, clearing any obstructions.
- Ensure the drain is clear by observing if water flows freely.
- Damaged Door Seals (Gaskets)Faulty door seals allow warm air to enter, leading to condensation and reduced cooling efficiency.Solution:
- Inspect the door gaskets for cracks or tears.
- Clean the seals with mild detergent and warm water to remove debris.
- If damaged, replace the gaskets to ensure a proper seal.
- Dirty Condenser CoilsAccumulated dust and debris on condenser coils hinder the refrigerator’s ability to cool effectively.Solution:
- Unplug the refrigerator.
- Locate the condenser coils, usually at the back or beneath the unit.
- Use a coil brush or vacuum to gently clean the coils.
- Perform this cleaning every six months to maintain efficiency.
- Faulty ThermostatA malfunctioning thermostat can cause the refrigerator to run too warm or too cold, affecting cooling performance.Solution:
- Test the thermostat by adjusting it to a colder setting and listening for a response.
- If there’s no change, consider replacing the thermostat or consulting a professional.
- Overstuffed RefrigeratorOverloading the refrigerator blocks air vents, restricting airflow and leading to uneven cooling and potential leaks.Solution:
- Avoid overfilling the refrigerator.
- Ensure items are not blocking internal air vents.
- Organize contents to allow proper air circulation.
- Improper LevelingIf the refrigerator isn’t level, it may not close properly, causing cooling issues and water leaks.Solution:
- Use a level to check the refrigerator’s position.
- Adjust the front legs to ensure the unit is slightly tilted backward, allowing doors to close automatically.
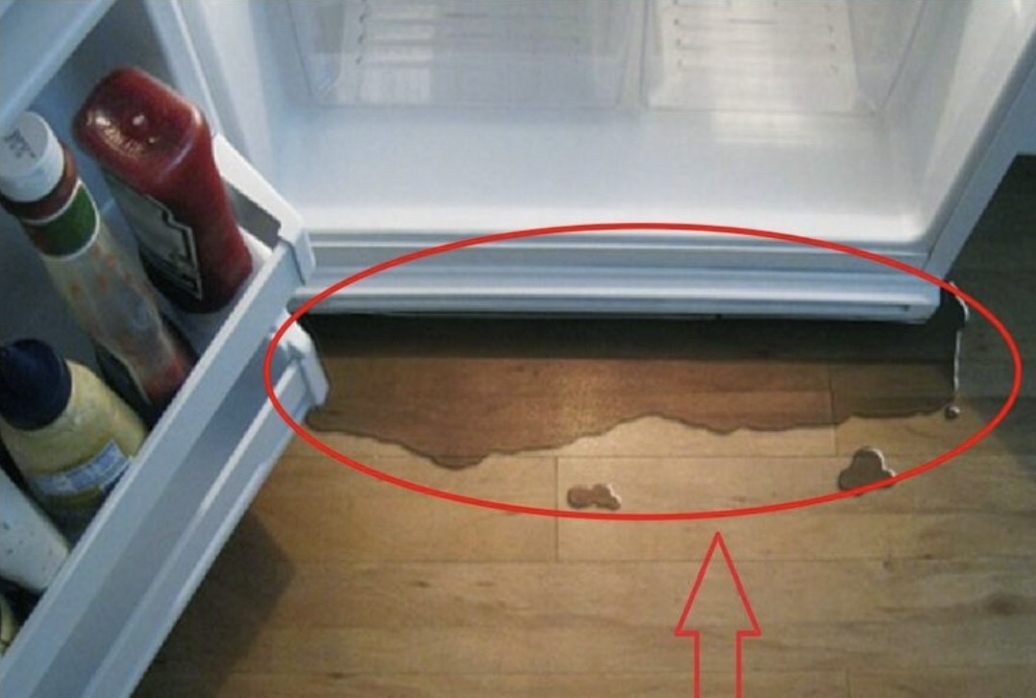
- Cracked Drain PanA damaged drain pan can lead to water leaking onto the floor.Solution:
- Unplug the refrigerator.
- Locate and inspect the drain pan beneath the unit.
- If cracked, replace the drain pan.
- Faulty Water Inlet ValveFor refrigerators with ice makers or water dispensers, a defective water inlet valve can cause leaks.Solution:
- Inspect the water inlet valve for cracks or loose connections.
- Replace the valve if it’s damaged or malfunctioning.
- High Humidity LevelsIn humid environments, excess moisture can accumulate inside the refrigerator, leading to leaks.Solution:
- Use a dehumidifier in the room to reduce humidity levels.
- Ensure the refrigerator doors are sealed tightly to prevent moist air from entering.
- Frozen or Clogged Water Supply LineA frozen or blocked water supply line can cause leaks and affect the ice maker’s performance.Solution:
- Unplug the refrigerator.
- Locate the water supply line and inspect it for blockages or ice buildup.
- Thaw any ice blockages by allowing the refrigerator to sit unplugged or by using warm water.
- Replace the water line if it’s damaged.
Preventive Maintenance Tips
- Regular Cleaning: Clean the interior and exterior of the refrigerator regularly to prevent mold and mildew buildup.
- Check Door Seals: Periodically inspect and clean door gaskets to ensure a tight seal.
- Monitor Temperature Settings: Keep the refrigerator temperature between 37°F (3°C) and 40°F (4°C) and the freezer at 0°F (-18°C) for optimal performance.
- Annual Professional Inspection: Consider having a professional technician inspect your refrigerator annually to identify and address potential issues before they become major problems.
By understanding these common causes and implementing the suggested solutions, you can effectively address water leaks and cooling issues in your refrigerator, ensuring it operates efficiently and prolonging its lifespan.