A Night That Shook the Skies
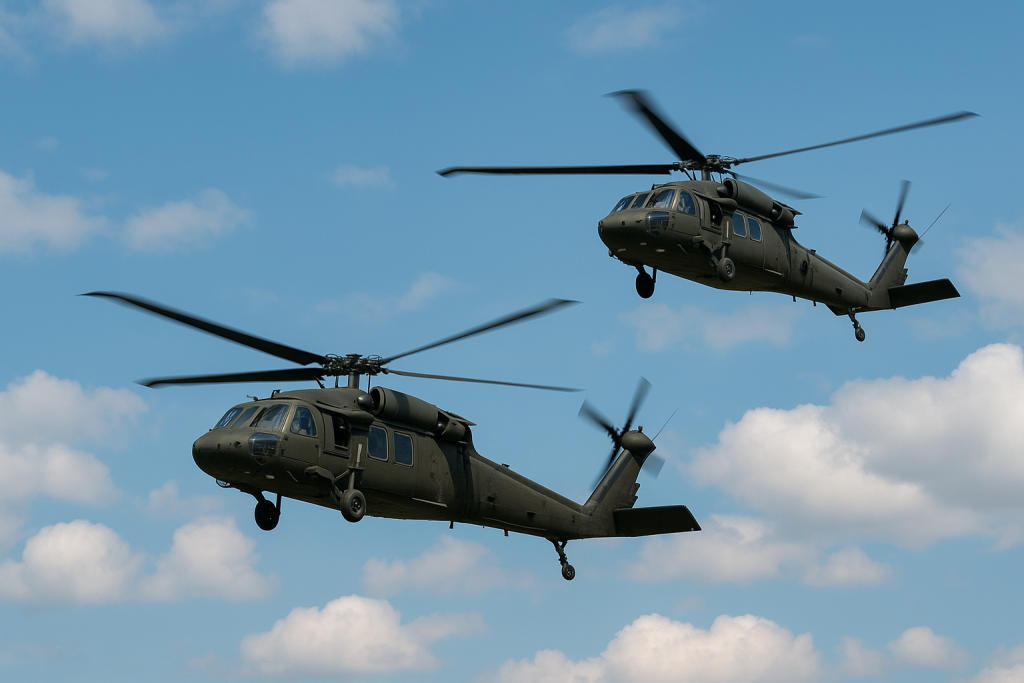
On the night of March 29, 2023, two U.S. Army HH-60 Black Hawk helicopters collided in mid-air during a routine training mission near Fort Campbell, Kentucky. The crash, which claimed nine soldiers’ lives, stands among the most tragic incidents in recent U.S. military aviation history.
The collision occurred around 11 p.m. local time, during night-vision training exercises. Both aircraft belonged to the 101st Airborne Division (Air Assault) — a highly skilled unit often referred to as the “Screaming Eagles.”
How the Accident Unfolded
According to the Army Combat Readiness Center, the two helicopters were performing a synchronized training maneuver when they made contact mid-air before crashing into a field in Trigg County, roughly 30 miles northwest of Fort Campbell.
Witnesses nearby reported seeing two bright flashes in the sky followed by the sound of impact. Emergency responders arrived within minutes, but unfortunately, all nine service members onboard — five in one aircraft and four in the other — were pronounced dead at the scene.
Both helicopters were HH-60 variants of the Black Hawk, configured for medical evacuation (MEDEVAC) operations. They were flying under night-vision goggle conditions, a common but challenging scenario requiring perfect coordination between pilots.
What Investigators Found
The Army later confirmed that the aircraft collided mid-air, not because of a mechanical malfunction after the fact. The flight data recorders (often called “black boxes”) were recovered from both helicopters and analyzed for flight parameters and communication data.
A preliminary report ruled out hostile action or weather as factors, focusing instead on human-factor elements such as spatial disorientation, reduced visibility under night-vision optics, or potential lapses in formation spacing.
As of the most recent updates, the final investigation report has not been made public, but preliminary evidence suggests the crash resulted from a breakdown in situational awareness during a complex night-time exercise.
Community and National Reaction
News of the crash sent shockwaves through the Fort Campbell community and beyond. Local residents held candlelight vigils, and flags were flown at half-mast in honor of the fallen.
Major General JP McGee, commanding general of the 101st Airborne Division, described the event as a “heartbreaking loss for our soldiers and their families.” Tributes poured in nationwide, emphasizing the courage and dedication of the servicemembers who train daily under difficult conditions to protect others.
The Black Hawk Legacy
The UH-60 Black Hawk, introduced in the late 1970s, remains one of the U.S. Army’s most versatile and battle-tested helicopters. It is used for troop transport, search-and-rescue missions, medevac operations, and logistical support in combat zones around the world.
While its safety record is generally strong, night-time formation flying poses significant risks, even for highly trained pilots. Factors like depth-perception loss under night-vision, wind turbulence, and communication gaps can contribute to tragic outcomes.
Lessons and Lasting Impact
Following the Fort Campbell crash, military leaders ordered a temporary safety stand-down across all aviation units to review flight procedures, equipment, and training standards.
Experts say the tragedy could lead to new safety measures, including improved simulation training for night operations, stricter spacing protocols, and enhanced cockpit monitoring technology.
Though the investigation is ongoing, this accident serves as a somber reminder of the dangers military aviators face — even in training — and the precision required to keep each mission safe.
Final Thoughts
The 2023 Fort Campbell mid-air collision stands as both a tragedy and a lesson in aviation safety. As the Army continues to refine its procedures and technology, the sacrifice of those nine soldiers will remain a lasting reminder of courage, discipline, and the high stakes of flight.
Disclaimer:
This article is written for informational and storytelling purposes only. Events and details are presented based on publicly available reports. Any accompanying images are AI-generated for illustrative purposes and do not depict real individuals or scenes.